8 Core Strengthening Moves with the Yoga Wheel
I was guilty of this until I took my first yoga wheel workshop and got comfortable playing around with it, and now I use my wheel for a lot more than just draping myself over top in a yummy backbend (which IS really nice, I’m not gonna lie). But, there are TONS of other ways to use your yoga wheel, and it’s super fun to get creative.
This accumulation of poses focuses on strength building through the center of the body. Yes, the core. There, I said it. I almost hate to use the word “core” because I feel like it’s so fitness-based and overused. But….I do think core strength is actually really important to overall strength and staying out of pain.
As I’ve entered my 40s, my low back pays the price if I neglect good-old-fashioned core work, as I’ll collapse into my lumbar curve. Also, I am a bit obsessed with arm balances and inversions, and core work is KEY to developing the strength to tackle these postures. When I practice these, I feel strong, free, and balanced…like I can take on the world. I hope these yoga wheel moves help you feel the same way!
If you don’t have a wheel yet, I prefer the original Dharma Yoga Wheel, which you can get here. (Just FYI, this is an affiliate link, which means if you make a purchase using the link I may receive some love in return!)
Without further ado, below are 8 postures using your yoga wheel to strengthen your core (and more). Video clips are featured to help you picture what we’re doing and try it out. Just like any yoga prop, when the yoga wheel is a part of the practice, things can get both harder AND easier. So listen to your body, do what you can, and have fun!! Let’s roll!!
{Download a Printable Version here –> 8 Core Strengthening Moves with the Yoga Wheel}
1. Supported Side Plank with Oblique Work
The first core exercise you can try is this version of Side Plank, leaning your hip on the yoga wheel. You’ll really need to engage through the midsection to make sure you don’t roll off! Here’s how to do it (watch the short video to get a feel for it):
- Start by kneeling next to the wheel.
- Lean onto the wheel with the right hip, and place your right hand down into a Side Plank arm, grounding down into the mat.
- Stage 1: Extend your left leg straight with your foot on the floor and extend your top arm up. Stay here and enjoy! Or, move on!
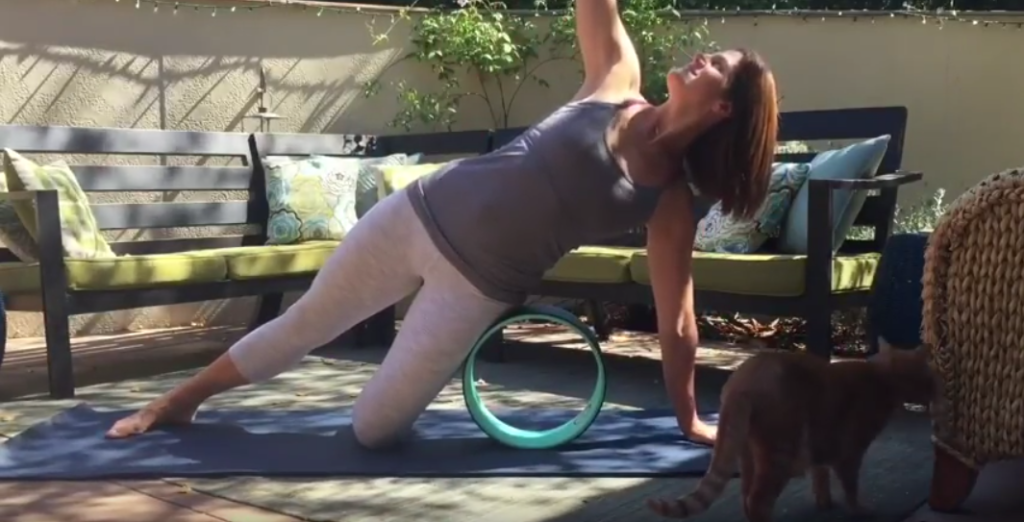
- Stage 2: From this lovely supported Side Plank, SLOWLY bend your top knee and hold onto your big toe with your left peace fingers. Extend your top leg toward straight into Full Vasisthasana II. Inhale and hold here, and then with your exhale, take the top leg out in front of you. Inhale and take your leg back up toward the sky. Exhale, bring the leg out in front. Repeat 5x. Stay engaged and strong!

The wheel really helps you keep the hips high and to get feedback on whether your hips are square or not. It feels great.
2. Dolphin Side Plank Oblique Crunch
This modified version of Vasisthasana (Side Plank) on the forearm takes the pressure off the wrists while still strengthening the core. 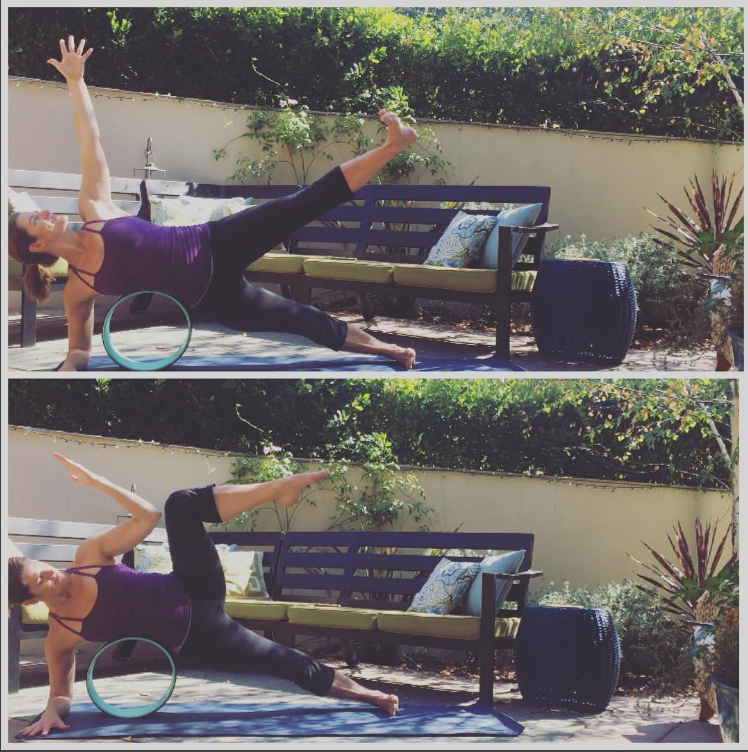
Adding an oblique crunch by bringing the elbow and the top knee together and then extending the leg out makes for an extra challenge. Take about 5-8 reps. Great for focusing the MIND too, while trying to stay balanced. I love to add a little side drape over the wheel to relax and stretch after each side.
3. Navasana
Here’s a fun variation of Boat Pose or Navasana using the yoga wheel. One of the most well-known yoga poses for core strength, Navasana makes me feel challenged, strong, and a little humble as I try to find the sitbones, lift up through the heart, and keep the legs strong. For this variation, follow these steps: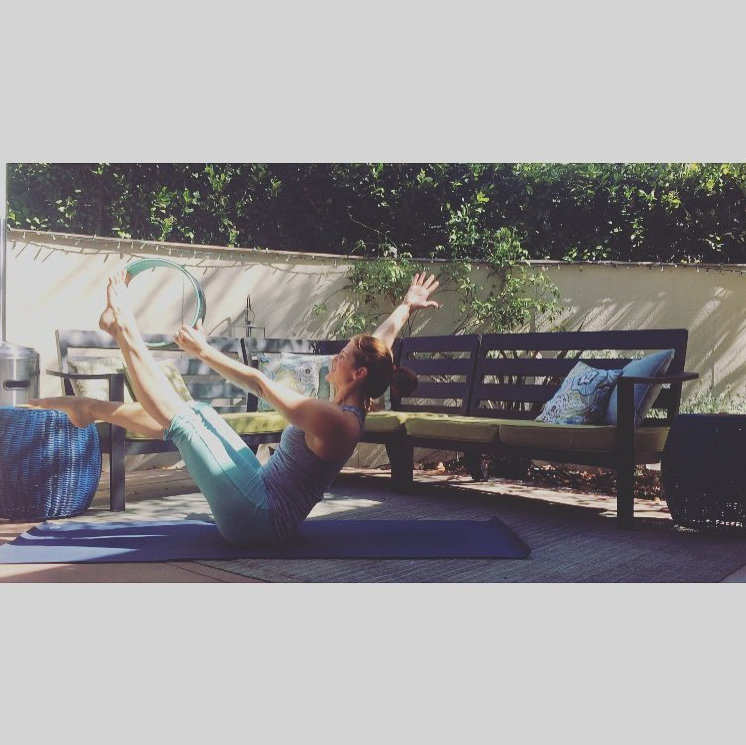
- Start by holding the sides of the yoga wheel and hook the big toes on the inside of your wheel.
- Stage 1: Keep the shins parallel to the floor or stretch the legs up toward straight.
- Stage 2: Release one hand and stretch the arm up alongside your ear, and then float the leg on that same side off the wheel, bending the knee and keeping shin horizontal. Hug everything to the midline, and hold for 3 breaths.
Then try the other side!
4. Double Straight Leg Reach
Next up is some core work with a Double Straight Leg Reach, or a Variation of Viparita Karani, commonly known as Legs Up the Wall Pose. According to Sherie Sloane, “This pose tones the abdominals, but its biggest benefit is working the entire core and its 4 layers (rectus abdominis, external and internal obliques and transverse abdominis), hip flexors, spine extensors, hip adductors & abductors (which includes the glutes). Adding the yoga wheel gives us the bonus of strengthening the arms. This pose also helps regulate blood flow in the body, relieve tired feet, legs & mild backache, and improves concentration.”
Here are the steps:
- Lie on your back with legs straight up, and arms up holding the wheel. A practical tip with this one is to make sure you have a strong grip on the wheel with your hands so you don’t drop it on your face!
- With a breath out, curl the shoulders up, reaching the wheel up, and repeat 10x.
After this core work, you’ll be well prepared for the arm balance…coming up next!
5. Bakasana
Here are two flavors of Bakasana or Crow Pose using the yoga wheel!! The first one is definitely easier and is a nice way to experiment with getting the feeling of balancing on your hands with your feet up. The second is WAY trickier. Remember to have fun!!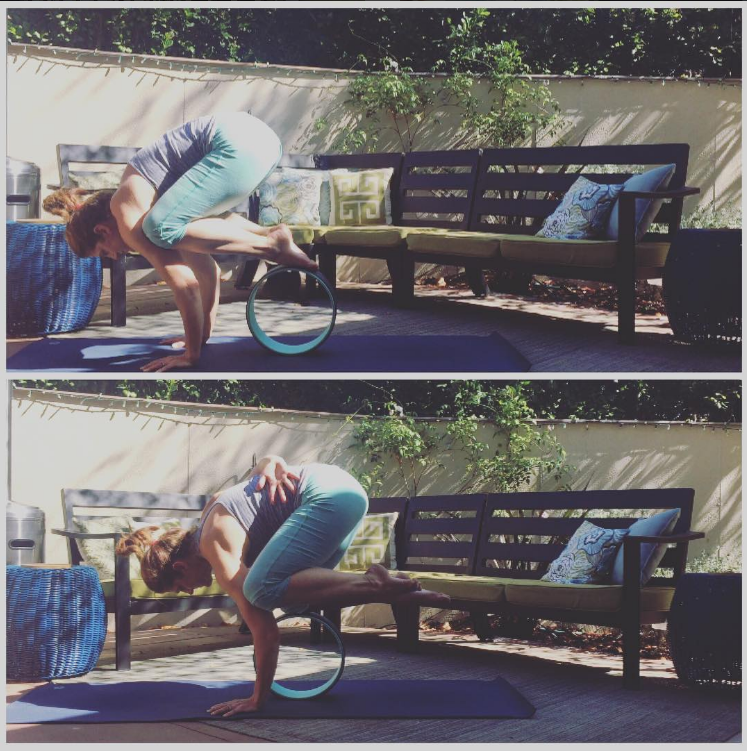
Follow these steps:
Crow, Tops of the Feet on the Wheel
- Start in Malasana or Yogic Squat.
- Place your hands in front of you, gaze forward, lift your hips high, and then snuggle your knees as far up around your upper arms as you can.
- Engage the core, and then carefully place the top of one foot on the top of the wheel (you may have to look back BRIEFLY to find the wheel). Then look back forward so your gaze is in a tripod shape with your hands, and then lift the other foot up onto the wheel.
- Push the hands down, draw the belly in, BREATHE.
- I love this variation, as it gives an opportunity to feel what it’s like to have the shins more parallel to the floor
One-Armed Bakasana
Note: This one is very challenging! I had to play with this one several times, and I really had to think about where my balance was, where I could find a tripod shape, and to go very slowly into this. It was pretty fun.
- Start with the wheel more between your hands than behind, and bring one knee to the middle the wheel.
- Then bring the other knee high up to the outer arm, or even into the armpit.
- Here’s where it gets really tricky. See if you can pick up your opposite arm (the one your knee is NOT resting one) and take a half bind with that arm. You may have to put your opposite foot down on the ground while you play with it. Have fun!! And if you fall, no worries…just try again. Hug into the midline, and breathe with this.
6. High Plank to Low Plank
This is a simple way to amp up your Plank to Chaturanga using the yoga wheel. Caveat: please make sure you have a solid Chaturanga practice BEFORE you add the yoga wheel, as there is a big tendency to drop the shoulders when lowering to the floor from Plank, and you don’t want to compromise the health of your shoulder girdle (if you’re not sure, skip this one and/or ask a trusted teacher for advice and help in person). 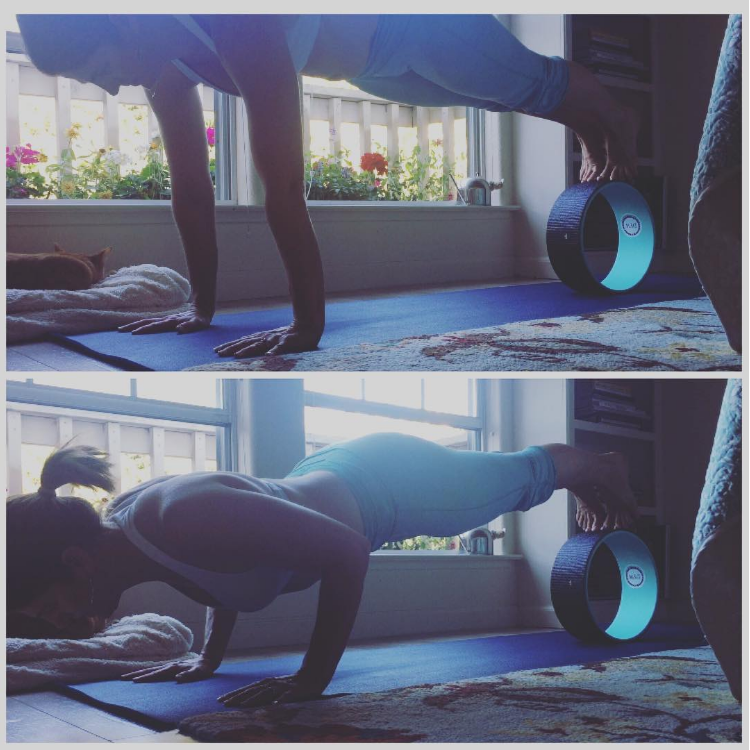
If you’re up for it, step your toes on the wheel and try this transition from high plank to low plank, only going as low as you can keep the shoulders and hips from dropping…talk about a strength builder, when it’s done with good alignment. Shoulders up, abs in, strong legs, head in a straight line, BREATHE….Whew!!
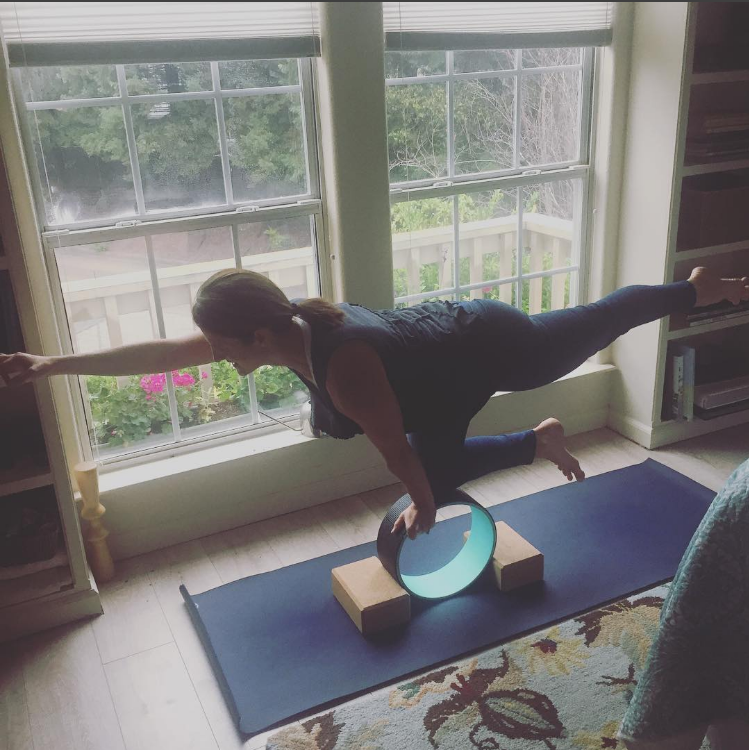
7. Cow Pose Variation
Ready for a balance challenge? This was fun to try out, and I’m using blocks on either side of the wheel to make this more accessible! Trust me, this was still a challenge.
Here are the steps:
- Set up your yoga wheel between two blocks so it’s stable.
- Stage 1: Hold onto the wheel with both hands and get your bottom knee in place, while you extend the back leg back and find your balance.
- Stage 2: Try reaching the opposite arm out in front of you. Go slow!!
One side is definitely harder for me. Notice if that was the case for you too!
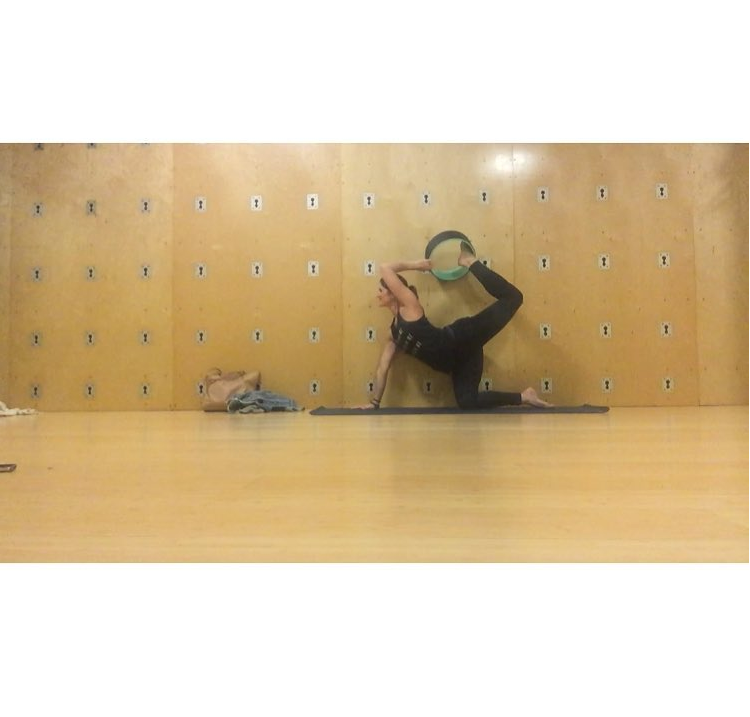
8. Tiger Pose
This is a variation on the pose above but adds a backbend shape. I used the wall for support. When I was initially working on this, I found it really frustrating and difficult to keep my balance until I got the idea to use the wall! Much better!
Here are the steps:
- Note: to prepare for this, you may want to stretch our your quads and shoulders, especially if you’re tight in those areas, like I am.
- Come onto hands and knees right next to a wall. Lean your hip against the wall for support and ground down into the hand that is next to the wall.
- Stage 1: Stretch the leg that is further from the wall back behind you and bend your knee.
- Stage 2: Pick up the wheel with the hand that further from the wall, look behind you, and see if you can hook the foot into the rim of the yoga wheel. This can be tricky, and it’s a BIG stretch for a front of your chest and shoulder. Be conservative and don’t push it!
- Stage 3: Point that elbow down towards the floor, and then rotate the elbow out to the side and then up to the sky. Release out the way you came.
 Empowering women who are 40+ to install movement habits that are nourishing, strengthening, and approachable for a truly calm and connected life.
Hi,
I am struggling to do planks on the wheel. Every time I place my feet on it, it either falls down or goes sideways. I am so wobbly on it. Backbends are easy on it but, I can’t do any core work.
Any suggestion how do I bring the wheel forward while my feet on it in a straight line instead of falling on my sides.
Thanks
Great question, Rita! For sure, the wheel WILL make plank super wobbly. That is great description, and I’m with you on that!
As with any movement, the way to develop strength over time is to go BACK to a movement you can currently do, and then work up to more complicated and challenging versions as your brain and body is ready.
So for this one, how do you feel in a regular Plank position with your feet NOT on the wheel? Try that, and hold Plank for about 30 seconds or so. Then you can try the more challenging version with your feet on the wheel.
Also, you could try anchoring the wheel in place by using a block on either side to stabilize the wheel, as we do in some of the other positions.
Lastly, use your WHOLE body!! Shoulder shoulders and core and entire legs need to participate, so get those recruited.
Try those ideas and let me know how it goes!